
Recreating Nordic farmhouse ales in a scrappy Kentucky farmhouse homebrewing environment
This blog has been a long time coming. The concepts of raw ale and Nordic farmhouse yeasts first worked their way into my head when researching historical brewing for my first book Make Mead Like a Viking. I began to experiment more in-depth when I began to focus more on beer brewing for my second book Brew Beer Like a Yeti. It seemed that as I delved deeper into this fascinating subject, my yearning for knowledge just kept growing. The rabbit hole was long and deep…and very, very old. Much of this information been hidden away from most of the world until recently. Two people who helped uncover the entrance to this Brewing Wonderland for me were Mika Laitinen from Finland and Lars Marius Garshol from Norway. In their respective blogs (Brewing Nordic and Larsblog) and books (Viking Age Brew and Historical Brewing Techniques), they explore farmhouse brewing traditions in Finland, Norway and The Baltics that have quietly continued in rustic corners of these countries while the rest of the developed world fully embraced modern brewing with all of its regimented precision, temperature control and extreme cleanliness.
My books, Lars and Mika’s books and blogs, and a few others can give you the context you need if you’re curious to learn more. The intent of this blog, though, is to document my personal explorations into Nordic farmhouse brewing, which began in earnest with my Pacific Northwest Viking Brewing tour with Mika in the summer of 2019, and my discussions with Lars, specifically in this article, this interview, and this book review.
(Note that I originally planned this as part of a three-part “Historical Brewing Techniques” series, but this part turned out rather long, so I’ll be splitting it into three parts; they can do that in the movies so why shouldn’t I?)
First, a bit about me

Me at the Zimmerman Óðrerir Mead Hall (no, this isn’t where I live). Photo by Dave Brown, one of the Viking Nerds and creator of Don’t Fall in the Mead Hall.
If you’re new to my work (or even if you’re not…), it bears mentioning that I have never considered myself a “professional brewer” or a “brewing expert.” What I am is a professional writer who explores the fringes of the brewing world and practices what I learn at home. I then document what I learn in books, articles, blogs and other media. If that makes me a professional, then I guess you can call me a Professional Gatherer of Arcane Brewing Knowledge. While I started out doing by-the-book homebrewing, I quickly grew weary of all the specifics and “necessities” and lost my passion for a while. What got me back into it was when I began to research historical and traditional brewing and came to the realization that brewing isn’t all that different than cooking.
There are certainly steps to be followed and things that, if done “wrong,” could make for something not very tasty or result in a pleasant surprise—but traditionally brewing was simply a part of farmhouse life along with raising crops and animals and keeping the family fed. While I don’t have anything against brewing competitions, I never brew with an intention to compete. I feel that would hold me back from exploring new things, and my life is just too chaotic to fret about whether or not I’m brewing something exactly “to style.” If I brew it and I drink it and I like what I drink, I’ve succeeded. If not, I check my notes and try again.
Although I don’t live on a farm (I did grow up on one though), I live in a very old, very cramped house, and have two young children to raise. I also do a lot of gardening, food preservation and other “modern homesteading” stuff. Hence, I don’t have the time, energy or space to practice highly regimented, excessively sanitized homebrewing. I take notes, I keep my equipment clean, and I follow (or create) recipes, but I don’t let myself get caught up in fretting over whether everything is “just right.” This blog is for those who understand this way of brewing or can at least appreciate that there are plenty of us out there who brew like this.
My goal in this series of blogs is to chronicle my explorations in brewing raw ales and working with the Nordic farmhouse yeast kveik. For more detail on these subjects, I highly recommend Lars’ and Mika’s blogs and books. I am indebted to them for their exhaustive research, but have adapted what I have learned to how I need to brew in my scrappy little home brewery. The good news is that I have had few missteps. Most of my brews have been quite good to exceptional (with a few that ranged from okay to kind of awful). I can’t say for sure in every case what made a brew turn out bad but I have some ideas, and am confident in what caused the good ones to be so damn tasty.
So, what is raw ale, and how do you brew it?
I’m going to be up front with you: you’re going to need to have some brewing knowledge and the ability and equipment to brew with malted grains (i.e., all-grain brewing). While I hope to make this interesting for beginning brewers, you’ll need to explore some introductions to all-grain brewing and prepare some equipment if you want to make these brews. There are plenty of resources on the web, and a fair share of books and magazine articles to help introduce you. Shameless plug: I can say that I provide an introduction to the subject—and instructions for building affordable equipment—in my books Brew Beer Like a Yeti and Make Mead Like a Viking. So, skipping ahead, I’ll assume you at least understand the basics of how beer is brewed so I can keep the word count down here.
Whether you’ve brewed with all-grain or have only done extract or brew-in-a-bag (BIAB) brewing, a vital part of the process is the boil. Not so with raw ales. Without going into too much into the technical details on why we do a boil in modern brewing, I’ll sum it up briefly. The primary reasons we boil are to: break down proteins for clearer beer and increased shelf life, pasteurize the wort to avoid souring, and bring out the aroma and bittering qualities of hops. Historically, boiling beer wort would have been resource-intensive, time-consuming or just plain not possible, as it requires high amounts of steady heat and large metal vessels (although hot rocks placed in wooden vessels or small cauldrons was a technique often employed historically). The mashing and lautering processes bring out all of the fermentables and flavoring characteristics you need to create a beer; albeit, a very different beer than one made by boiling the wort. As for pasteurizing, the wort gets plenty hot enough during the mashing process to take care of this. As Mika Laitinen puts it in his blog entry Sahti and Related Ancient Farmhouse Ales:
“This lack of wort boil has a tremendous effect on the beer, and is one of the major traits of Nordic-Baltic farmhouse ales. A beer from a non-boiled wort has a short shelf life, but when fresh, has an exquisite taste of malt and cereals. Due to retained proteins, it also feels nutritious, smooth, and full bodied. An ale completely devoid of boiling steps is called raw ale.”

Left: a raw ale Mika Laitinen brewed along with Paul Arney of The Ale Apothecary, myself, and Seth Klann of Mecca Grade Malt in Bend, Oregon. Here it is being displayed in a glass at the Skål Beer Hall in Seattle during a presentation Mika and I put on about Viking Age Brewing. Right: two slightly different raw ales I brewed at home with “wild” ingredients from my yard, including yarrow and wild violet (behind the glasses).
The flavor of a raw ale is a very unique thing, but is difficult to describe. This is primarily because it is tantamount to asking someone to describe the taste of beer, or to provide a general description of how meat tastes. As with boiled beers and cooked meat, there are a huge number of factors to consider; not to mention personal tastes. I have brewed multiple raw ales and tasted a few made by others. While there are some similarities in overall flavor and mouthfeel, I realize that I’ve barely hit the tip of the iceberg when it comes to all of the possibilities. Mika’s description above is a good indication of what to expect, though. Raw ales are malty, grainy and full-bodied due to the proteins present, but from there the flavor can vary wildly. The type of malt used will have a significant effect on the flavor, and raw ales made with no additives other than yeast can be quite tasty. Add in flavoring ingredients, the type of yeast used…and factors such as when you drink it, the vessel you’re drinking it from, and the circumstances in which you’re drinking it…hopefully you get the picture.
To me, raw ale is an ephemeral thing. It’s meant to be drank shortly after brewing, and each one I make is based on the individual circumstances of the brew day and my available ingredients. I’ve definitely bottled some raw ales, which hold up well for the most part, but drinking them as close as possible to when I’ve brewed them is what I prefer. Flavor characteristics of the raw ales I’ve tried vary wildly, but include: malty sweetness, herbal notes, tropical, citrus and candy flavors (primarily due to the use of kveik yeast), and a certain something that I can never quite put my finger on. Some have varying degrees of tartness and what I can best describe as a “sharp” flavor, and some have hints of bitterness (due to the use of few to no hops, bitterness in my raw ales is rarely heavily pronounced).
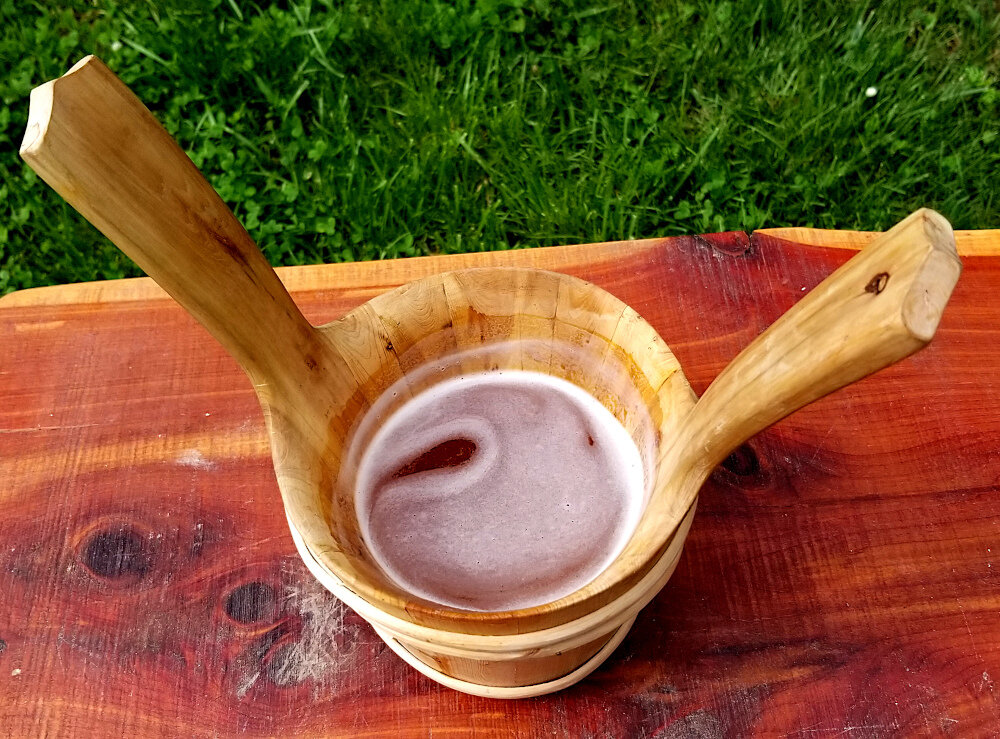
How I prefer to drink my raw ales: freshly brewed and straight from the fermenter in a traditional drinking vessel such as this haarikka (a smaller version of a shared feast-drinking vessel) from Finland. Read more about haarikkas and farmhouse feast ales here.
These flavors are all more or less evident depending on when I drink it. For instance, sweetness works its way into dryness from my first tastes a couple days after brewing to my final tastes before finishing it off or bottling it. Another factor is mouthfeel; they can be smooth, viscous and lightly carbonated initially, and almost flat when at their peak (raw ales aren’t traditionally carbonated unless drank while still fermenting). Being a farmhouse ale, I suppose I should say that there are barnyard flavors present, but for most of the best ales I’ve brewed, one thing I’ve been impressed at is how clean they taste. In short, drinking raw ale is an experience unto itself. I’m not saying every one I’ve had is absolutely delicious (although many are), but as with any fine wine, mead or beer, there’s a lot going on with every sip and every one of them has something to be appreciated.
Grains and malting
In my research into Finnish, Norwegian and Baltic raw ales, I’ve found that there are some standards as to what types of malts are used and the percentages in which they are used in the grain bill. However, what was most clear to me is that there really isn’t a “standard,” per se. In most Northern European farmhouse brewing regions, barley is the primary (and often only) malt, sometimes complemented by a small percentage (usually around 5-10%) of rye. At times, wheat and oats (both malted and unmalted) make up a small portion of the grain bill. Most modern farmhouse brewers don’t use smoked malts, but historically, smoky malts would have been very common, as a low-heat, smoky fire was the most efficient method for drying. While it’s unlikely you can emulate traditional farmhouse malt bills exactly, you can come close by using mostly Pilsner, Vienna and Munich, along with some rye, caramel or smoked specialty malts. That said, this is just a small sampling of malting options, as each region and each particular farmhouse has its own unique recipes and malting and brewing techniques.
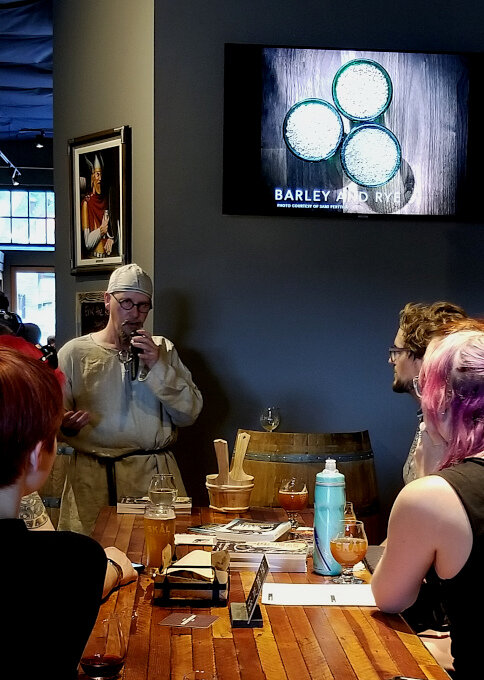
Mika Laitinen discusses typical malts used in Nordic farmhouse ales during a talk and raw ale tasting at the Skål Beer Hall.
In initially reading up on raw ales, the process sounded a bit daunting and time-consuming to me. However, in practice, I find that if I have everything ready to go by, say noon on a Sunday afternoon, most of the day can be spent relaxing or catching up on other projects, as a lot of the time is spent waiting. Otherwise it’s just time spent grinding my grains, gathering water (usually filtered from the tap), bringing the water to the appropriate temperatures, and lautering, recirculating, sparging and cooling the wort. My main focus for the day is brewing, as I want to make sure I do everything properly, but it has honestly become a pretty relaxing, meditative thing at this point.
I should note that, while the brew-in-a-bag (BIAB) method will work when making raw ales, it isn’t ideal. There is no recirculation of the wort and you can’t quite pull off the temperature changes the way you do with mashing in a tun. The resulting wort will be fermentable and very well may make a tasty beer, but the wort will be very turbid. That said, I haven’t actually tried it. If anyone reading this has given it a try, I’d be curious to know how it turned out.
I’ll go into more detail about specifics when I write up my final blog in this series, but for now, I’ll provide a basic rundown of the process. There are a lot of variables depending on exactly which kind of raw ale you’re brewing, but I mostly base my brewing process off of the sahti-brewing process described by Mika Laitinen in this blog.
Raw ale brewing process
I often brew my raw ales using the single-infusion mash method, generally brewing at around 145° F (63° C) to 150° F (70° C). To get the full flavor spectrum of a traditional raw ale such as sahti, though, you’ll want to perform a multi-step infusion mash process. This means that you’ll be increasing the temperature of the mash over stages. This is easier if you have a mash kettle that you can place over direct heat, but I emulate it well enough using my converted cooler mash tun. The following steps are for those of you who are able to heat your mash-tun. I’ll then provide some alternative options for those of us who use converted coolers for mash-tuns. (Addendum to original article: there is actually a large range of raw ale brewing styles, some of which use the multi-step infusion process and others that use single-step infusion. See the end of this blog for a bonus discussion on this.)
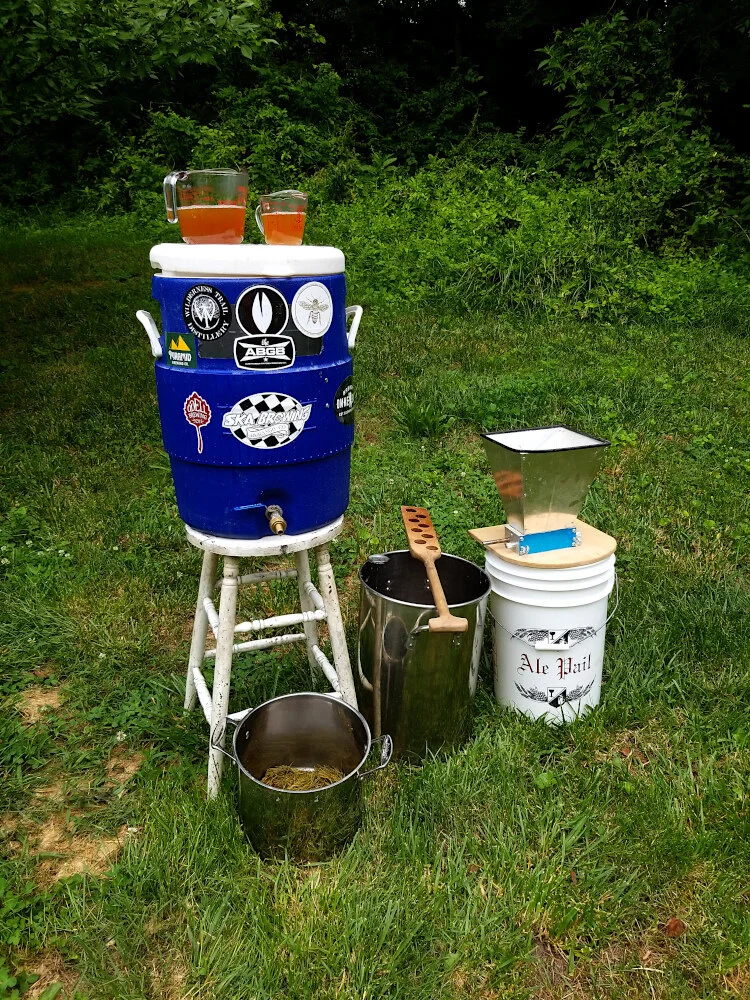
My brewing equipment. On top of my mash-tun is two samples of raw ale wort I used to start two different types of kveik yeast. On the right is my Cereal Killer Grain Mill.
Step 1: Heat your strike water (1 quart / 1 liter of water per one pound / .45 kilograms of grain) to 150° F (70° C) and blend with malted grains in your mash tun. Your goal is 140° F (60° C), but I always heat the water about 10 degrees higher, as you’ll lose some heat as the grains absorb the water.
Step 2: Let the mash rest at 140° F (60° C) for 45 minutes.
Step 3: This is a good time to add juniper, pine or fir branches to the mash. Then raise the temperature to 160° F (70° C) for 45 minutes and finally to 176–185° F (80–85° C) for the last 15 minutes.
Step 4: Lauter and recirculate until the wort runs clear. If you’re using hops and didn’t add them to the mash, you can either add them to the wort now or run the wort through them via a nylon bag tied to your mash-tun spigot. Sparge with 180° F (82° C) to 200° F (93° C) water until you’ve gathered about 5 gallons / 20 liters of wort in a brewing pot. If using an immersion chiller, add it now to sterilize the chiller.

For this raw ale, I lautered through some dried aged hops I keep to use for ales for which I want hops’ antibacterial properties, but little in the way of their flavoring or bittering potential.
Step 5: Cool the wort using a wort chiller or ice bath. Aerate the wort (by stirring and/or pouring vigorously into your fermenter) and pitch yeast at its appropriate temperature. (I’ll cover more on yeast in a future blog).
There are a couple of alternatives for folks who can’t heat their mash-tuns. Historically, hot rocks were sometimes added to bring up the temperature. You can still do that, but that’s a whole other bag of rocks that I won’t be covering here. I do cover it in one of my books though.
Option 1: Use as little initial water as you can and start with a very thick mash. Every 15-20 minutes, pour small amounts of hot water (180° F / 82° C to 200° F / 93° C) water over the mash using your preferred sparging technique to slowly raise the temperature. Do this four or five times until you reach a mash-out temperature of 176–185° F (80–85° C), then sparge until you’ve collected about 5 gallons / 20 liters of wort. This isn’t the most precise method, but it does work.
Option 2: Start with the full amount of strike water, and draw about 1 gallon / 4 liters of wort out at a time. Then heat the wort using the temperature guidelines for heated mash-tuns above and add it back to the mash. Proceed with lautering, sparging, cooling and yeast-pitching.
This is just the overall process to get you thinking. For the next blogs in this series, I’ll go into more detail on ingredients, yeast and, yes, recipes! I’m very open to any feedback from other raw ale brewers. I’d love to hear different experiences and techniques, and am open to constructive criticism. Just keep in mind that I don’t have a technical mindset when it comes to brewing. I try to keep everything basic and to the point to demystify the brewing process. I’m happy to engage in nerdy brewing discussions, but if you’re going to be a turd about it, you will be flushed.
Skål for now.
-Yeti
Bonus!
In discussing this blog and farmhouse brewing in general in an email conversation with Mika Laitinen and Lars Marius Garshol, some interesting ideas were brought up. Ever the analyst, Lars even looked into the data came up with some graphs on the spot (or perhaps he already had them from a project he was already working on). I couldn’t help but share what was discussed, so with their permission I am including slightly amended (mostly to clarify who is saying what) version of our discussion (with me being the proverbial fly on the wall) below.
Lars: The multi-step infusion mash process is traditional for sahti, and parts of eastern Norway, but in many places (western Norway, Lithuania, parts of Estonia, parts of Denmark, etc.) people did just a single-infusion mash. That is, they mashed at one temperature and that was that.
Mika: In my experience, step mashing is more useful for high gravity raw ales. It helps to extract malt sugars better when the mash is fairly thick. Single infusion works well for medium gravity raw ales (say below 7 % ABV) where more water can be used for mashing and sparging. Perhaps the variation in the traditions reflect this.
Lars: Hmmm. Yes, could be.
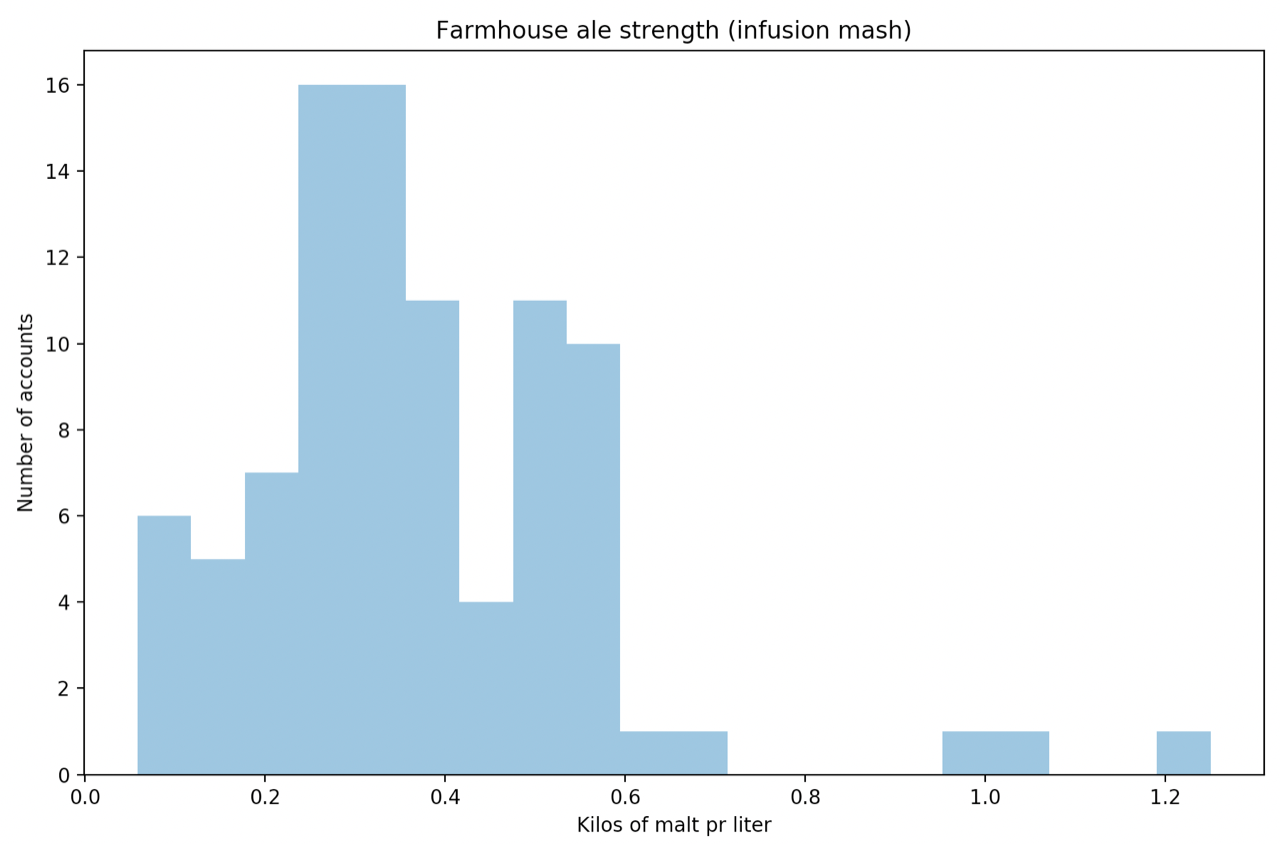
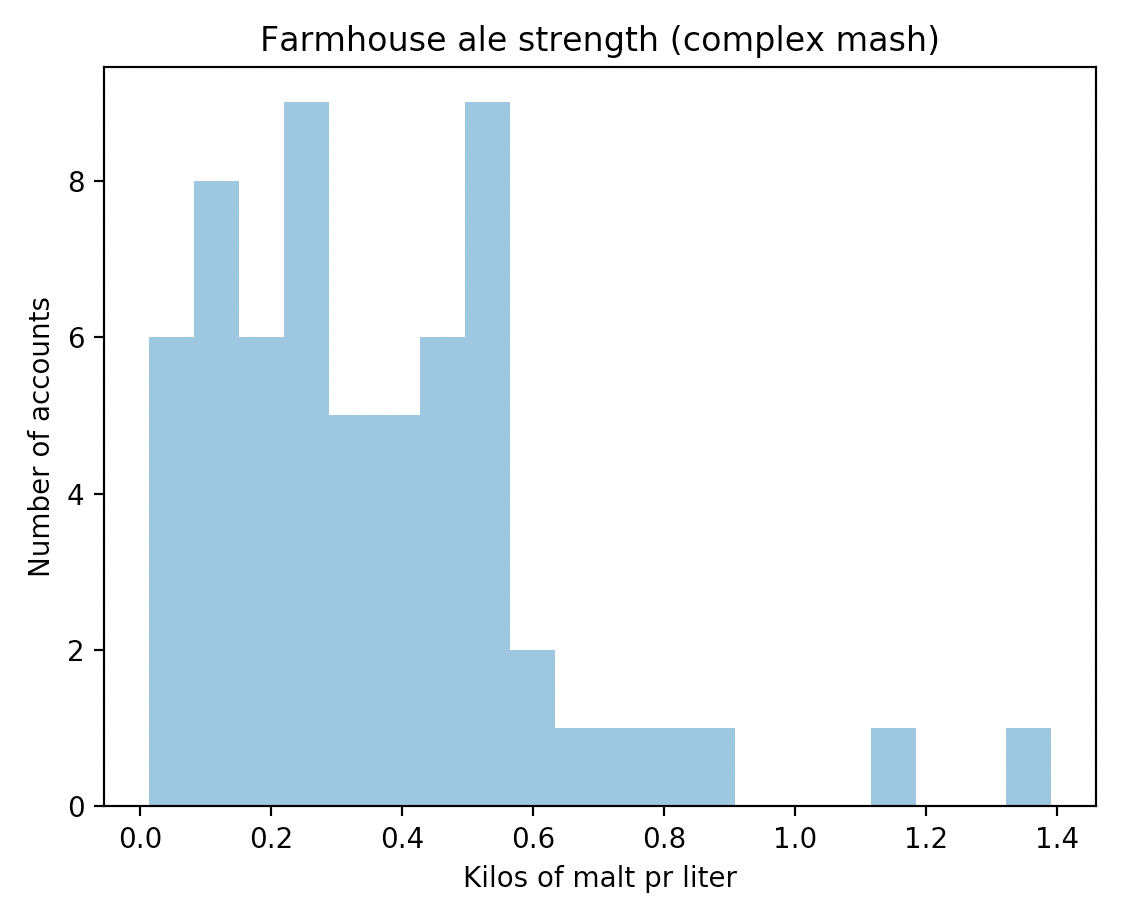
Graphs courtesy Lars Marius Garshol.
Lars: Hmmm. There’s no clear difference that I can see here. On the map there is a clear geographic patterning to the infusion/complex mash distribution, so I suspect this is simply about different customs spreading to different regions.
Mika: Nevertheless, for a raw ale beginner it might be easier to be prepared to raise the mash temperature towards the end of mashing. With smaller batches the temperature can drop a lot more than with typical farmhouse ale batch sizes and anyway two steps give more flexibility to the process.
Lars: True. I find the temperature does tend to drop toward the end when I brew kornøl, which can give a drier and more attenuated beer than you really want for that style.
Me: (Nods humbly and steps away).